This article will show you how to whitelist email addresses on popular email clients, ensuring that you get the emails you want.

“Why do my emails always end up in the spam folder?” That’s a question that we always get when we start talking about email marketing to our clients.
Now, there might be many reasons why some emails get flagged as spam (suspect subject lines, disreputable IP addresses etc). And while there are ways to guard against them, the only surefire way to ensure that your email gets through is to get your receivers to whitelist your email address.
This means that the receiver has explicitly told his email client to accept any emails that come from your email address.
Of course, when it comes to email marketing (when you’re sending emails to a group of people instead of just one person) there are additional precautions that you should take. But that’s another story for another day.
Add This Help Article to All Your Email Signatures
Here’s a simple solution we’ve prepared for you to help ensure that all your emails bypass those hyperactive spam folders and into your clients’ inbox. Just add a line like this to your email signature and link it to this article (full link – https://cloudrock.asia/whitelist-email-address/).
How to Whitelist Email Addresses from Various Email Clients
1) Gmail / Google Apps
We use Google Apps at CLOUDROCK and we think it’s great, so you’re going to get the full illustrated version for it.
a) If you can’t find our email, first check in the ‘Spam Folder’
b) Select our email and click the “Not Spam” button
c) Open the email that you have received from us and click on the little down-pointing-triangle-arrow next to “Reply”:
d) Click “Add [Sender Email Address] to Contacts list”
2) Yahoo!
In order to whitelist emails in Yahoo! Mail, you’ll need to create a filter to automatically receive emails from selected email addresses.
a) Find and click the ‘Options’ tab in the top right navigation bar
b) Select ‘Mail Options’ from the drop down list
c) Choose ‘Filters’ located on the bottom left corner of the page
d) Click’Add’
e) Choose the field you want to match in the incoming message. For example, you can use the “header” or “to” fields
f) Choose the criterion by which you want a match to be made, such as “contains”
g) Enter the text string you want matched. For example: from “fairuze.shahari@cloudrock.asia”
h) Choose the destination folder to which you would like the message delivered (such as your ‘Inbox’ or ‘Backup’ folder)
3) Hotmail
a) Open your mailbox and click on ‘Options’ in the upper right hand corner
b) Click on the ‘Junk E-mail Protection’ option
c) Click on ‘Safe List’ near the bottom
d) Copy and paste “@cloudrock.asia” in the section that states “Type an address or domain”
e) Click the ‘Add’ button
4) Outlook 2010
a) Click on the ‘Home’ tab.
b) Click on ‘Junk’
c) Then ‘Junk Mail Options’.
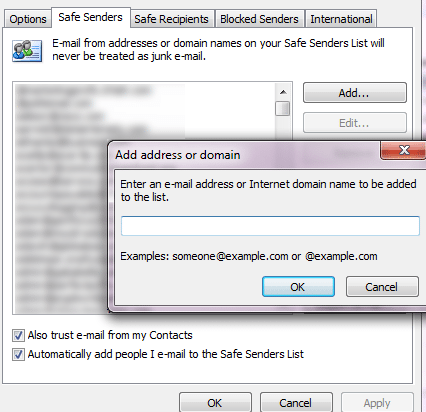
d) In the ‘Junk E-Mail Options’ dialog box that shows up, click the ‘Safe Senders’ tab (second option). Proceed to add all the email addresses (fairuze.shahari@cloudrock.asia) or domains (@cloudrock.asia) you want whitelisted.
e) Click OK.